Proper installation of a fiber optic box ensures your network operates efficiently and reliably. It improves performance by protecting connections and reducing signal loss. Challenges like moisture infiltration or cable strain can disrupt your setup. Using solutions like the Dust-proof IP45 2 Cores Fiber Optic Box helps you overcome these issues while enhancing maintenance efficiency. Additionally, incorporating a Fiber Optic Wall Box can further streamline your installation process, providing a secure and organized environment for your Fiber Optic Boxes.
Key Takeaways
-
Pick the correct fiber optic box by knowing its details. Check for things like splice trays and cable holders for best use.
-
Get all needed tools and items before you begin. Use a splicing machine, cable strippers, and cleaning tools for a good setup.
-
Find a good spot for your fiber box. Make sure it’s easy to reach, has good airflow, and is safe from weather to keep it working well.
Step 1: Choose the Right Fiber Optic Box
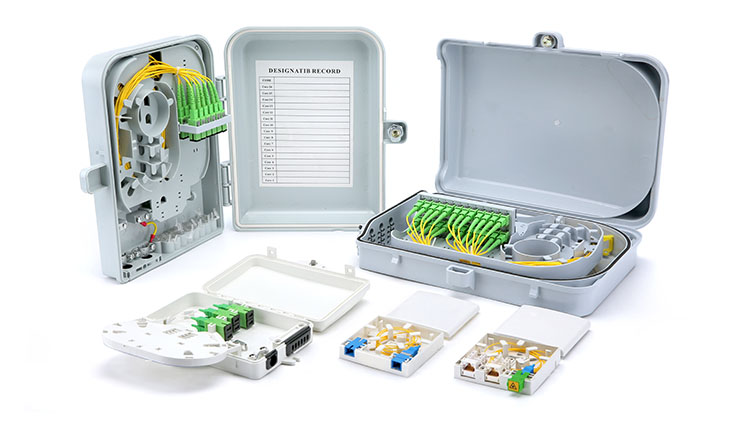
Understanding Fiber Optic Box Specifications
When selecting a fiber optic box, understanding its specifications is essential. These boxes often include key components like splice trays, cable management features, and connectors. Splice trays help organize fibers neatly, while cable management features secure cables to prevent damage. Connectors simplify the process of linking cables, ensuring the system performs efficiently. The materials used, such as ABS, PC, or SMC, provide mechanical and environmental protection, safeguarding your fiber optic connections from wear and external factors.
Different specifications impact performance in unique ways. For instance, distribution box types influence scalability and flexibility, while high-quality materials minimize signal loss, improving data transmission. Choosing the right specifications ensures your fiber optic network operates at its best.
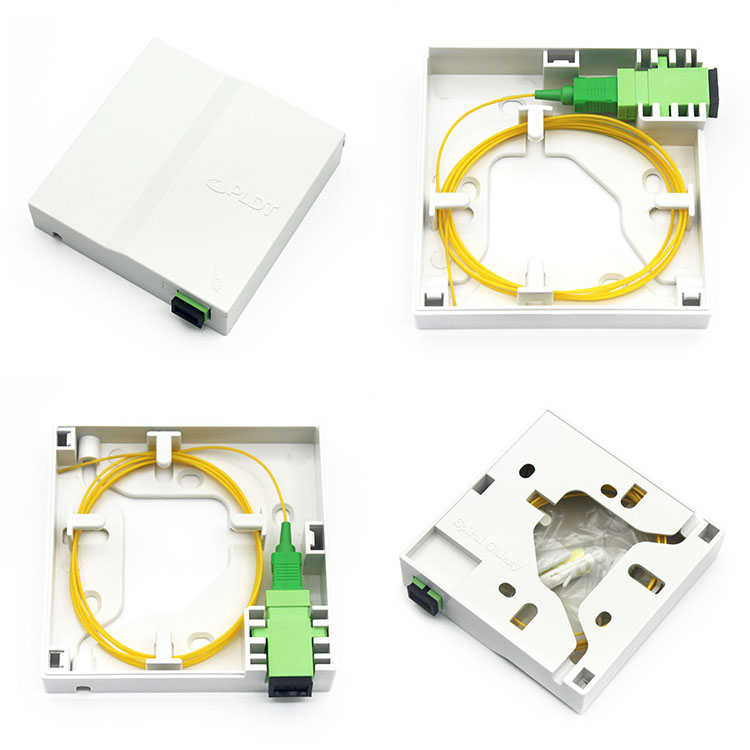
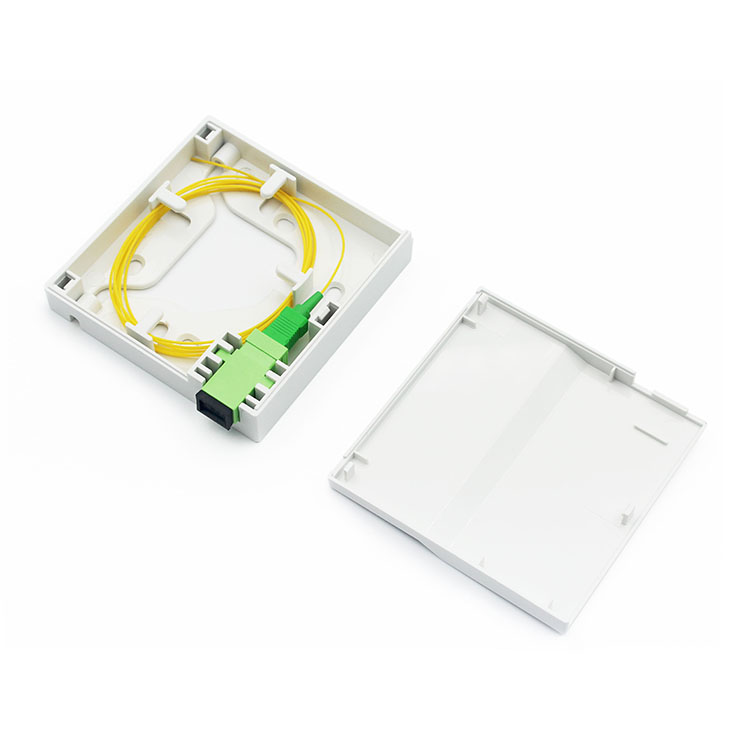
Why Dowell’s Dust-proof IP45 2 Cores Fiber Optic Box Stands Out
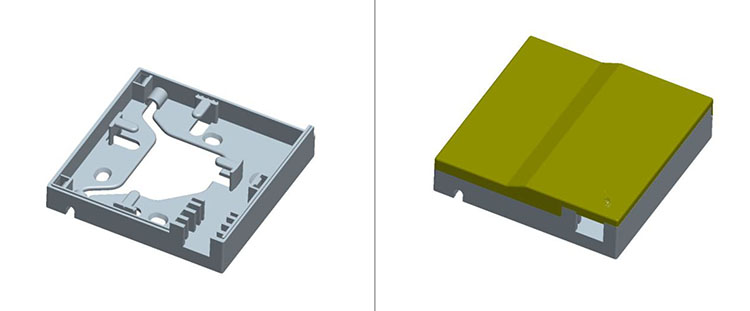
Dowell‘s Dust-proof IP45 2 Cores Fiber Optic Box offers a perfect blend of durability and functionality. Its compact design integrates splicing, termination, and storage, making it a versatile solution for managing fiber optic connections. Constructed from high-quality PC+ABS materials, this box provides robust protection against dust and environmental stress. It supports SC simplex and LC duplex modules, offering flexibility for various cabling needs.
This fiber optic box also prioritizes user convenience. Its solderless module design allows for quick and hassle-free installation, even for beginners. Whether you’re setting up a residential or small business network, this box ensures reliable performance and long-term efficiency.
Ensuring Compatibility with Fiber Optic Cables and Network Needs
Selecting a fiber optic box that aligns with your network requirements is crucial. Consider the following factors:
-
Application: Choose a box suitable for indoor, outdoor, residential, or industrial use.
-
Capacity: Ensure the box can accommodate the number of fibers your network requires.
-
Protection Level: For outdoor setups, opt for a box with a high IP rating to shield fibers from environmental elements.
-
Ease of Installation: Look for features like multiple cable entry points and user-friendly cable management.
-
Future Expansion: Select a box that allows for easy upgrades to support network growth.
Dowell’s Dust-proof IP45 2 Cores Fiber Optic Box meets these criteria, making it an excellent choice for various applications. Its compatibility with different fiber optic cables ensures seamless integration into your network, enhancing both performance and reliability.
Step 2: Gather Necessary Tools and Materials
Essential Tools for Fiber Optic Box Installation
To install a fiber optic box effectively, you need the right tools. These tools ensure precision and reliability during the setup process. Here’s a list of essential tools you should have:
-
Fiber optic splicing machine for joining fibers securely.
-
Cable stripping tools to remove insulation without damaging the fiber optic cables.
-
Scissors or precision cutting tools for clean cuts.
-
Fiber optic cleaning supplies, such as reagent alcohol and wipes, to maintain connection quality.
-
Fusion splicer and cleaver for accurate fiber alignment and cutting.
-
Fiber optic testers like OTDR (Optical Time-Domain Reflectometer) to verify signal integrity.
-
Screwdriver set for mounting the fiber optic box.
-
Labeling machine to organize and identify cables efficiently.
These tools help you achieve a professional-grade installation, ensuring your fiber optic network operates smoothly.
Materials Needed for a Secure Setup
Choosing the right materials is just as important as having the right tools. The materials you select should match the installation environment and provide adequate protection. Here’s a quick guide:
| Material Type | Characteristics |
|---|---|
| Metal | Robust, excellent protection against physical impact, suitable for industrial and outdoor environments. |
| Plastic | Lightweight, cost-effective, suitable for indoor and residential applications where heavy-duty protection is not required. |
| Weatherproof Materials | Essential for outdoor installations, made from UV-resistant plastics or aluminum to ensure longevity. |
These materials ensure your fiber optic box remains secure and durable, regardless of the environment.
Optional Accessories for Enhanced Efficiency
Adding optional accessories can improve the efficiency of your fiber optic installation. Consider these items:
-
Cable ties to keep fiber optic cables organized and prevent tangling.
-
Wall brackets for mounting the fiber optic box securely.
-
Heat shrink tubing to protect spliced connections.
-
Extra splice trays for managing additional fibers.
These accessories streamline the installation process and enhance the overall performance of your fiber optic network.
Step 3: Prepare the Installation Site
Selecting the Ideal Location for Your Fiber Termination Box
Choosing the right location for your fiber termination box is crucial for a successful installation. You should assess the site for suitability by considering several factors:
-
Ensure the location is easy to access for maintenance and upgrades.
-
Protect the box from environmental elements like moisture or extreme temperatures.
-
Place the box close to connected equipment to minimize cable length and signal loss.
By following these guidelines, you can create a setup that is both efficient and reliable. A well-chosen location ensures your fiber optic network remains secure and performs optimally.
Ensuring Proper Ventilation and Accessibility
Proper ventilation and accessibility are essential for maintaining the performance of your fiber optic box. Poor ventilation can lead to overheating, which may damage internal components. Install the box in a space with adequate airflow to prevent this issue. Accessibility is equally important. Make sure you can easily reach the box for routine inspections or repairs. Avoid placing it in cramped or obstructed areas. This approach simplifies maintenance and ensures long-term efficiency.
Avoiding Interference from External Factors
External factors can disrupt your fiber optic installation if not addressed. To prevent issues:
-
Use high-quality seals and gaskets to protect against moisture infiltration. Regularly inspect the box for signs of water damage.
-
Secure and support cables properly to avoid unnecessary strain during installation.
-
Check for fiber misalignment, especially after temperature changes, and reposition fibers if needed.
Taking these precautions ensures your fiber optic connections remain stable and free from interference. A proactive approach helps maintain the integrity of your network over time.
Step 4: Install the Fiber Optic Box
Step-by-Step Guide to Mounting the Box
Mounting a fiber optic box requires careful preparation and execution. Follow these steps to ensure a secure and efficient installation:
-
Preparation: Gather all necessary tools and materials, including the fiber optic box, cables, adapters, cable cutters, and cleaning supplies. Wear gloves to protect the fibers from contamination.
-
Prepare the Cables: Inspect the fiber optic cables for damage. Lay them out neatly, trim any excess length, and clean them thoroughly.
-
Install the Box: Securely mount the fiber optic box on the chosen surface. Use screws or brackets as needed. Label the box for easy identification during future maintenance.
-
Connect the Cables: Attach the cables to the box according to the manual. Ensure all connections are stable and properly aligned.
-
Test the Setup: Verify the connections and test the signal quality using appropriate tools. Schedule regular maintenance to keep the system running smoothly.
This step-by-step process ensures your fiber optic box is securely mounted and ready for use.
Managing and Routing Fiber Optic Cables Effectively
Proper cable management is essential for a successful installation. Follow these best practices to route your fiber optic cables efficiently:
-
Never exceed the maximum pulling load rating to avoid damaging the fibers.
-
Roll the cable off the spool instead of spinning it to prevent twists.
-
Label each cable for easy identification during troubleshooting.
-
Use protective conduits to shield cables from physical damage.
-
Bundle cables neatly to prevent tangling and maintain an organized setup.
For outdoor installations, consider trenching or micro-trenching to place cables securely. Always adhere to safety regulations and maintain a clean work area. These practices ensure your fiber optic cables remain protected and functional.
Connecting Components and Securing the Setup
Connecting components in a fiber optic box requires precision. Start by cleaving the fiber ends using a high-quality cleaver. Clean the fiber ends with specialized tools to remove dust and oil. Strip the outer jacket and coatings carefully to expose the fiber. Measure and mark the fiber for accurate alignment.
After preparing the fibers, inspect them under a microscope to check for imperfections. Use connectors to join the fibers, ensuring flexibility for future reconfigurations. Test the connections with a power meter to measure signal loss and an OTDR to check for reflectance issues. Respect the minimum bend radius and pulling tension to avoid damaging the fibers.
By following these steps, you can secure the setup and optimize the performance of your fiber optic network.
Step 5: Test and Optimize the Installation
How to Perform Connection Tests for Fiber Optic Boxes
Testing ensures your fiber termination box installation functions correctly and supports your network’s performance. Use the following tests to verify the setup:
| Test Type | Tool Required | Purpose |
|---|---|---|
| Visual Inspection | Fiber Optic Microscope | Check for imperfections |
| Signal Loss | Power Meter | Measure light transmission |
| Reflectance | Optical Time Domain Reflectometer | Identify splice/connection issues |
Start with a visual inspection to detect flaws in the fiber optic fabric or connectors. Use a microscope to examine the fiber ends for scratches or debris. Next, measure signal loss with a power meter to ensure efficient lighting transmission. Finally, use an OTDR to identify reflectance issues, such as poor splicing or misaligned connections. These tests confirm the reliability of your fiber optic network.
Troubleshooting Common Installation Issues
Even with careful planning, issues can arise during fiber termination box installation. Addressing these problems promptly ensures your network operates smoothly. Common issues include:
-
Signal Loss: Clean the fiber ends and check for proper alignment. Replace damaged cables if necessary.
-
Moisture Infiltration: Inspect seals and gaskets in outdoor fiber termination boxes. Replace worn components to prevent damage.
-
Cable Strain: Ensure cables are properly supported and not bent beyond their minimum radius.
Regular maintenance, such as cleaning and inspecting connections, prevents recurring problems. This proactive approach keeps your fiber optic projects running efficiently.
Optimizing the Fiber Termination Box for Long-Term Performance
To maximize the lifespan of your fiber termination box, follow these optimization techniques:
-
Use high-quality cleavers to create smooth, flat fiber ends.
-
Clean fiber ends with specialized tools to remove dust and oil.
-
Strip outer jackets carefully with three-hole jacket strippers to avoid damage.
-
Measure and mark fibers accurately for precise alignment.
Additionally, choose termination boxes with durable seals and impact-resistant designs. For outdoor installations, select boxes that withstand thermal cycling and chemical exposure. These practices ensure your fiber termination box remains reliable and supports your network’s long-term performance.
Installing a fiber optic box becomes seamless when you follow these five steps. A structured guide offers several benefits:
| Benefit | Description |
|---|---|
| Efficient Cable Management | Centralized solution for managing cables, reducing damage risk and improving performance. |
| Easy Maintenance | Organized layout allows for quick troubleshooting, reducing downtime and enhancing reliability. |
| Scalability and Flexibility | Designed for future expansions, allowing easy addition or removal of components. |
| Improved Signal Quality | Ensures proper termination, minimizing signal loss and enhancing data transmission. |
Dowell’s Dust-proof IP45 2 Cores Fiber Optic Box enhances reliability with its durable design and user-friendly features. If you prefer a hassle-free setup, professional assistance ensures optimal network performance and simplifies maintenance. Follow this guide to achieve a robust and efficient fiber optic network.
FAQ
What is fiber optic lighting, and how does it work?
Fiber optic lighting uses optical fibers to transmit light from a source to a specific location. It provides efficient, flexible, and decorative illumination for various applications.
Can I use a fiber optic box for creative projects like fiber optic fairy wings?
Yes, fiber optic boxes can support creative projects. They help manage and connect fibers for unique designs like fiber optic fairy wings, ensuring proper functionality and durability.
How do I maintain my fiber optic dress or fiber optic jellyfish skirt?
Clean your fiber optic dress or fiber optic jellyfish skirt gently with a soft cloth. Avoid bending the fibers excessively. Store them in a dry, dust-free environment to ensure longevity.
Post time: Feb-17-2025